With GroupLife, your group leaders can manage their small and community groups (~50 people or less).
Note: While you could use GroupLife to manage larger groups, we recommend using
Check-In Kiosk and/or
Classroom Manager. Those tools were specifically designed for efficient event tracking
and management — large group meetings included!
Basics
GroupLife is a fully responsive and integrated app where group leaders can see, manage, and engage with their Groups. It's a one-stop shop for seeing who is in the group, scheduling meetings, taking attendance, managing volunteers, and sending messages.
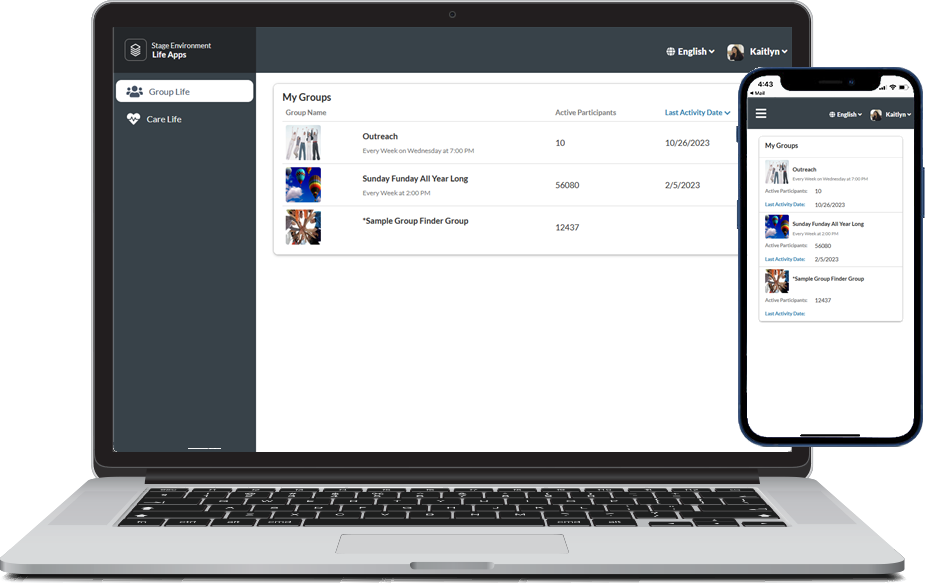
- To access GroupLife, start from the My Groups Widget and click the GroupLife button on a group.
- GroupLife requires authentication. Bonus: When navigating to GroupLife from the My Groups Widget,
you will not have to log in again!
Note: If group leaders have the same email on their User records, they cannot log in to GroupLife, even if they lead different Groups. You'll need to remove one (or both!) of the duplicate email addresses from the User record.
- Authenticated Users who are the Primary Contact or have a Group Role Type of "Leader" can:
- Add or remove participants.
- Schedule activities.
- Mark attendance or indicate that an activity was canceled.
- Respond to group sign-up requests.
- Send an email with attachments to the entire group or just selected participants.
- Send a text message to the entire group or just selected participants.
- Note: Want to let group participants communicate with each other? We have an app for that! Check out PocketPlatform.
- Authenticated Users who are active, current participants in the group can:
- View information about the group(s) they are in.
- View certain information about fellow group participants, but only if they have allowed it to be shared.
- Set their privacy options to share or hide their information
with other participants.
- See the next upcoming activity for their group(s).
- RSVP to indicate which activities they plan to attend, might attend, or won't attend.
Sections
Once you click into a group, you'll see the following tabs:
- Info: Dynamic display information about the group, including meeting cadence and
time, location, leaders, and description. The next upcoming activity also displays with an option to RSVP.
- Participants: Toggle between all current and past participants. Displays
their contact information (if available), and their Group Role, start date, and last attended date. And to help put a face to the name, if there's an image attached to their Contact Record, you'll be able to see that, too!
- Sign-ups: View Group Inquiries by name or date. Includes contact information,
the inquiry date, and a comment, if one is left by the pending participant. Group leaders can add or reject the pending group participant.
- Activities: See past (up to three months ago) or future (within the next 30
days) events and their location. You can also take attendance from this tab.
- Attendance: Mark group participants' attendance for an activity
that happened in the past 14 days or is currently in progress.
Admins: You can customize the language used in GroupLife, including these tab names! Go to System Setup > Application Labels, and update the appropriate records under the Application Name "TM.LifeApps".
Actions
If configured by an admin, group leaders and primary contacts can:
- Add or remove group participants. And if the "new" participant is already in the group, they won't be added a second time.
- Edit information about their group (like the description, meeting details, maximum target size, and group photo) and information about participants.
- Respond to a Group Inquiry.
- Accept volunteers into the group.
- Schedule an activity and review RSVPs.
- Mark attendance for attendees and guests.
- Send a message to the entire group or selected participants.
Getting Started
Here are some tips to be sure your groups are set up for success:
- Confirm your group leaders are the primary contact or have a Group Role Type of "Leader".
- On the appropriate Group Role record(s), set Manages Volunteers to "Yes".
- Confirm leaders and primary contacts have a User Record if they want to send messages, mark attendance, and so on.
- Confirm leaders aren't sharing an email with another user. Each will need to have a unique email address.
- Confirm the Group Record has Available Online
set to "Yes".
And here are some additional setup details you need to know:
- All dates/times display in the Congregation's time zone.
- GroupLife uses the APIUser to send emails. Make sure your APIUser has both the Administrators security role as well as a sufficient email quota for any emails sent through GroupLife.
Note: If you're using a proxy email, replies may be sent to that proxy if the email provider doesn't honor explicit "reply to" settings.
- Update the SERVICES, AttendanceNotificationPath Configuration Setting to GroupLife so that the link included in the attendance notification email will direct Users to GroupLife.
- See your church's logo at the top of GroupLife? It's the default file attached to your Domain Record!
- Review the following Configuration Settings:
- CLOUDAPPS, GroupMeetingEventTypeId - Configured to match existing Configuration Setting value PORTAL, DefaultEventTypeID.
- CLOUDAPPS, GroupMeetingProgramId - Configured to match existing Configuration Setting value PORTAL, DefaultEventProgramID.
- CLOUDAPPS, GroupMeetingRoomId - Will be set to '1' or the lowest existing ID on deployment. This ensures the flow works in every system at deployment. Action Required: You must review this setting and update
the Room ID to your church's desired value.
- CLOUDAPPS, ShowAddActivityButton - Set Value to '1' to allow leaders to add new activities.
- CLOUDAPPS, ShowAddParticipantButton - Set Value to '1' to allow leaders to add new participants.
- CLOUDAPPS, ShowEditGroupButton - Set Value to '1' to allow leaders to edit group information.
- CLOUDAPPS, ShowEditParticipantButton - Set Value to '1' to allow leaders to edit participant information.
- CLOUDAPPS, DefaultHouseholdPosition - Set Value to the Household Position ID of the default Household Position for newly added participants.
Note: Don't be alarmed if you change a configuration setting and don't see it reflected immediately. It may take up to 15 minutes for changes to display in GroupLife.
Accessing GroupLife
There are a few ways to access GroupLife, so mix and match the ones that work best for your church! To go directly to GroupLife, just copy the URL below, paste it into your browser, and replace "[church_name]" with your church's name.
https://[church_name].cloudapps.ministryplatform.cloud/apps/grouplife
- My Groups Widget: Group leaders and primary contacts will see a GroupLife button in the My Groups Widget.
This takes them directly to their group and passes authentication from the My Groups Widget.
- Notification Email: If leaders receive attendance reminder notifications, that email contains a link that takes them to GroupLife Info for their group. You can navigate to each menu section directly. Important: Be sure to update the notification path so that your attendance reminder notification emails include a
link to GroupLife. See Group Attendance to learn how.
- Direct Group URL: GroupLife can be accessed by direct URL, but it needs to include the Group ID in order to take leaders directly to their group. After you set it up, you can send leaders the link using the *GroupLife
Login Snippet and send the message from the Group Participants page. The correct Group ID displays automagically. Here's how to set that up:
- Go to
 System Setup > Pages.
 - Open the Group Participants Page.
- Add Group_ID_Table.[Group_ID] AS Group_ID to the Default Field List.
- Save.
- Go to Communications > Snippets.
- Open the *GroupLifeLogIn Snippet.
- Edit, and switch to Source View.
- Replace '0' at the end of the Snippet with the appropriate [Group_ID].
- Save.
Here's what your new Snippet should look like:
https://churchname.cloudapps.ministryplatform.cloud/apps/grouplife/[Group_ID]
Pro Tip: Do not bookmark your GroupLife URL. Instead, use the snippet or navigate to GroupLife from the My Groups Widget to ensure you are always taken to the latest version and a specific Group.
