Basics
- The Add/Edit Event Tool gives you a quick and easy way to add new Events or edit existing ones. You can also create and edit registration Products, Option Groups, Option Prices, and Promo Codes directly in the tool!
- You can configure Events (with or without registration) without having to define Rooms, which is useful for off-site Events. You can also choose any Location, not just those associated with the Congregation/Parish assigned to the Event, which is perfect
for church-wide Events at one location where anyone can attend.
- If needed, you can add, change, or cancel Room Reservations for multiple Events in a recurring series.
- The Tool can be launched from a page or an open record. If you open the Tool from a Page, you'll need to search for an Event to ensure it doesn't already exist before you add it as a new one. Pro tip: You're able to search for Events
on any past date or up to 60 days from now.
- When editing an Event in the tool, if it has existing Room Reservations (Group to Room mappings) where the associated Group is no longer active or has a past end date, you'll see a warning icon
 . These Groups will not be available for selection when creating a new Group to Room mapping.
- If you start adding an Event then close the Tool without saving, a draft is automatically saved. Next time you launch the Tool and try to create a new Event, you're asked to either restore your previous draft or start over.
- SPoCs can grant Users access to the tool via the normal process.
Adding a New Event
- From a Page displaying Events, click Tools > Add/Edit Event.
- Search for the Event you want to add to make sure it doesn't already exist:
- In the search box, enter an Event Name, Congregation/Parish, year, month, day of the month (e.g. April 15), day of the week, or Start Time. Search results (if available) will appear and update as you continue to type.
- If no record matches your search criteria, click the Add New Event button.
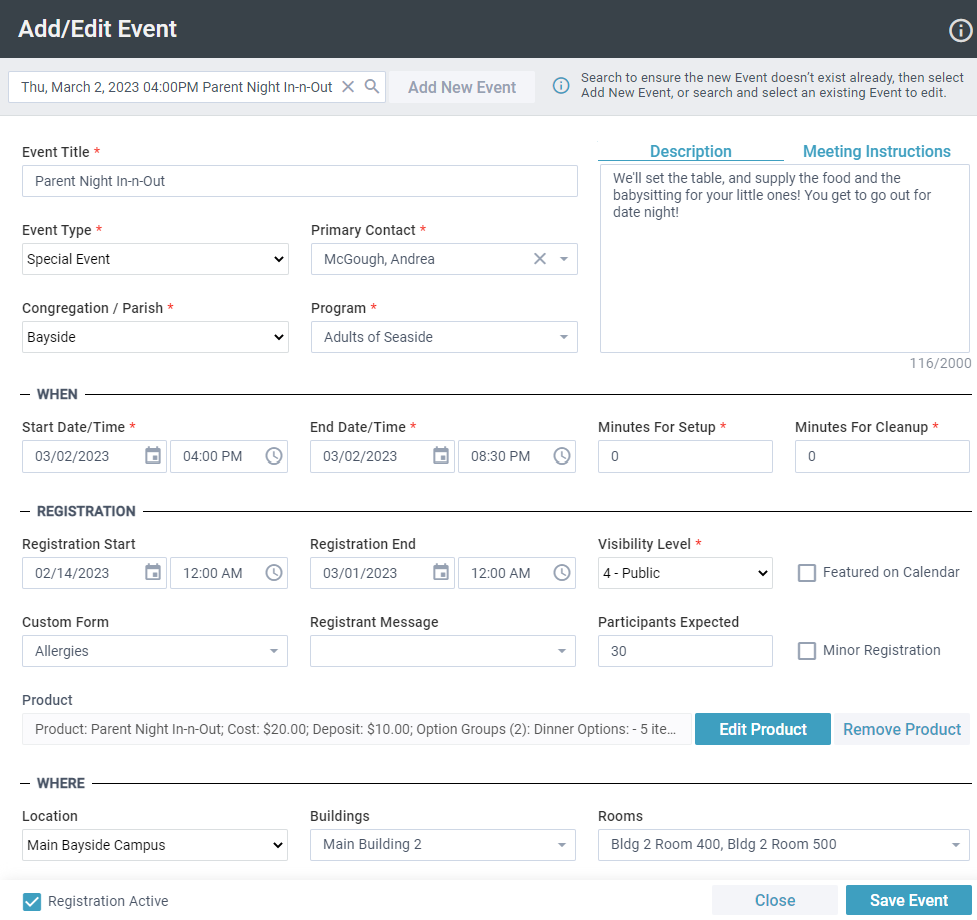
- Enter an Event Title, and select the:
- Event Type
- Primary Contact (Email addresses display to help differentiate between individuals with similar names.)
- Congregation/Parish
- Program
- Description and Meeting Instructions (optional)
- In the WHEN section, select the appropriate event information and options.
- In the REGISTRATION section, define the information needed if you want to require individuals to register to attend the Event.
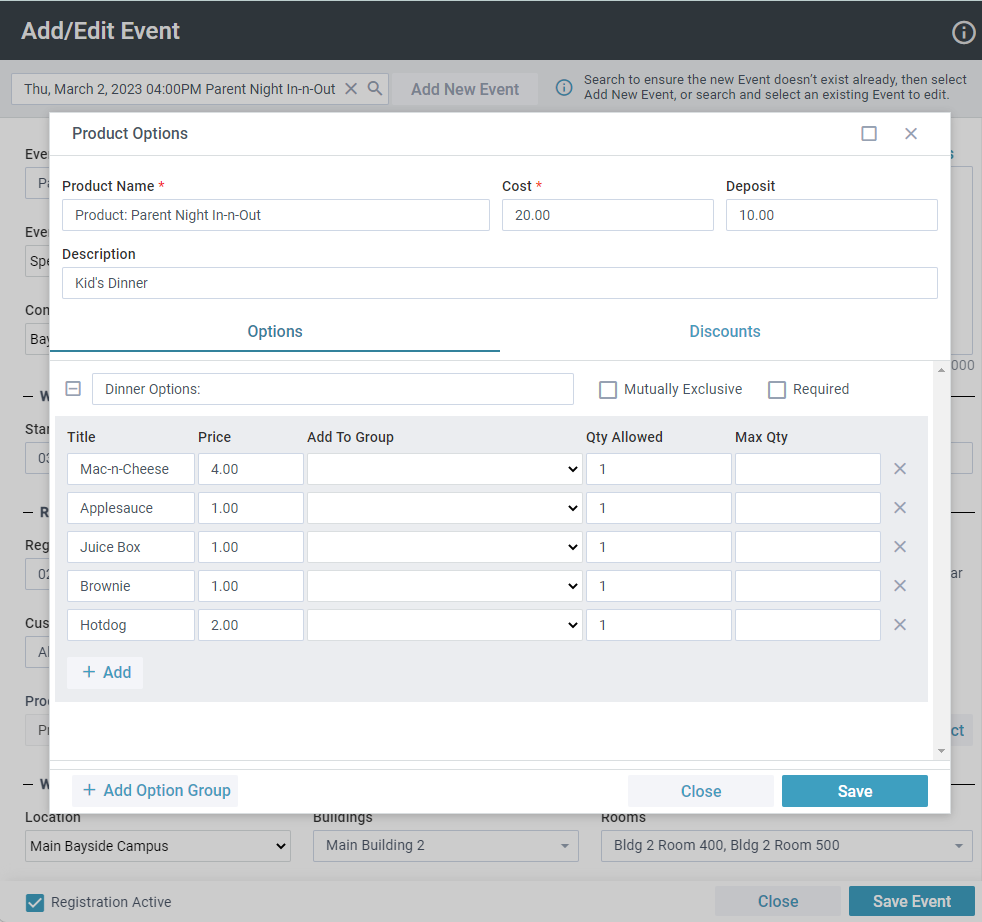
- You can choose to add a Product from here, which can save lots of time! Remember, a Product is required for Events with registration.
- Click Add Product. Pro Tip: A name is automatically generated based on the Event Name, but you can change it, if needed.
- Add the base Cost and required Deposit amount for this Event, if needed.
- Add any necessary Option Groups, and define one or more Option Prices to be listed under each Option Group.
- Set up any necessary Promo Code(s).
- When you're ready to create and use the Product, click Save.
- In the WHERE section, you can specify the Location, Building(s), and Room(s) where the Event will take place.
- In the WHO section, indicate whether Check-In should be used for this Event, and, if so, how Search Results should display in Check-In Suite.
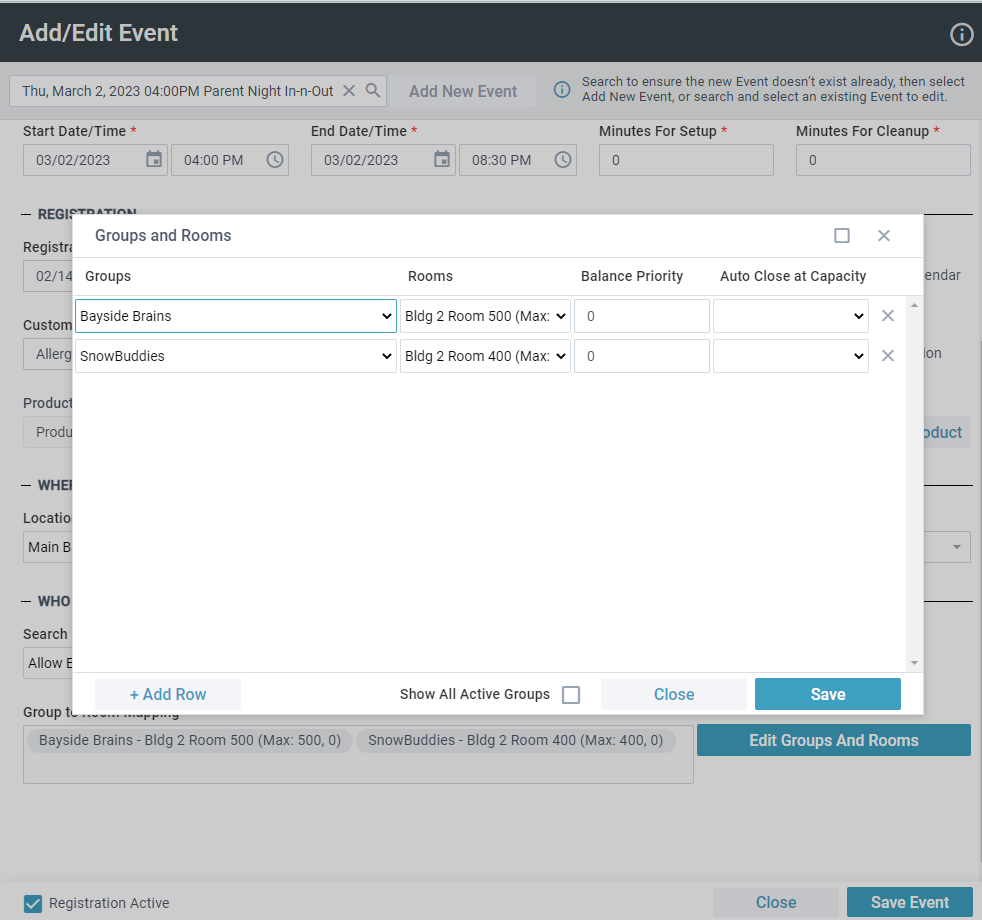
- If needed, map a Group to each Room, define Balance Priority values, and indicate whether each Room should be automatically closed once it reaches maximum capacity. Pro Tip: By default, only Groups associated with the selected Congregation/Parish
are available. Select Show All Active Groups to select any active Group from any Congregation/Parish.
- Select the checkbox for Registration Active if you want to set the Registration Active field on the Event record to Yes. This makes the registration available as of the Registration Start date/time.
- Click Save Event. The tool refreshes with a blank form, allowing you to search again; repeat the previous steps to add another event, if needed.
- Click Close.
When you save, the following are created: Event Record(s), Room Reservation Record(s), Product Record (if added), Product Option Groups (if added), and Product Option Price record(s) (if added).
Editing an Existing Event
- From a Page displaying Events or an open Event record, click Tools > Add/Edit Event.
- Locate the existing Event:
- If opened from inside an Event record, launching the Tool automatically opens that Event's information.
- In the search box, enter the Event Name, Congregation/Parish, year, month, day of the month (e.g. April 15), day of the week, or Start Time for the Event you're looking for. Search results (if available) will appear and update as you continue
to type.
- Click the existing Event in the drop-down list. If this isn't the Event you wanted, click the X beside the search bar to locate another one.
- Add or edit any event information. (Note the Recurrence Pattern is not available when editing an existing Event. That's only for new Events.)
- Click Save Event. The tool refreshes with a blank form, allowing you to search again; repeat the previous steps to edit another event, if needed.
- Click Close.
